This simple console application interfaces Telegram with ChatGPT, allowing Telegram bots to act as agents relaying messages to and from OpenAI’s ChatGPT, based on a personality assigned to the bot. From Telegram, you can query the bot, which relays the message to the ChatGPT API, queries OpenAI, and receives a response based on the personality of your Telegram bot, as customized within the configuration file. This was a quick one-day project, and I thought I’d share it online. I’ll add more features over time, so check back.
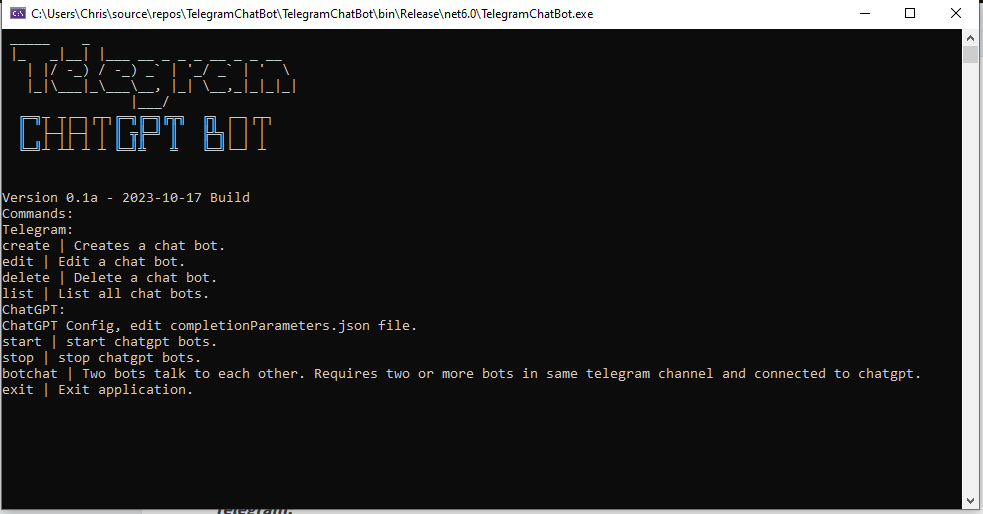
Commands: Telegram: create | Creates a chat bot. edit | Edit a chat bot. delete | Delete a chat bot. list | List all chat bots. ChatGPT: start | start chatgpt bots. stop | stop chatgpt bots. botchat | Two bots talk to each other. Requires two or more bots in same telegram channel and connected to chatgpt. exit | Exit application.
Getting Started:
To use this application you will need to modify the configuration files to interface the application with your Telegram bots and also your ChatGPT account. Below are the instructions on how to do this.
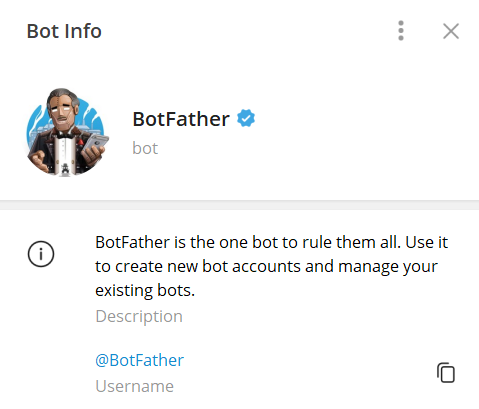
Enter the username for the bot, it must end with ‘bot’ and must be unique.
Congratz, you’ve just created a telegram bot. Copy the HTTP API token into bots.json file. In addition, add your botName (the bot’s telegram username) and full name, the ordinary name of the bot.
Enter a description of the personality you would like the bot to have. This will guide the bot’s personality when it uses ChatGPT to generate and respond.
Click “Create new secret key” and copy it to clipboard, then paste it into completionParameters.json apiKey : “your chatgpt api key here” and replace the text in the quotes. IMPORTANT: Never share your API key with anyone as this key can be used to access OpenAI services through your account.
Configure the settings of completionParameters.json to cater to your needs.
Important: I strongly advise implementing a usage limit for your OpenAI API account. Additionally, it’s advisable to restrict the usage of the API to a private Telegram channel. Querying ChatGPT typically incurs real-world computational costs. You can adjust the “max_tokens” per query using “completionParameters.json,” but please be aware that if your channel is open to the public, other users may also make queries with your bot, potentially leading to additional costs.
Brief explanation of each configuration parameter:
“apiUrl”: The URL for making requests to the OpenAI ChatGPT API.
“apiModelsUrl”: The URL for accessing information about available models.
“apiKey”: Your authentication key to access the ChatGPT API.
“model”: The specific ChatGPT model to be used, in this case, “text-davinci-003.”
“prompt”: The initial text or context provided to the model to generate responses.
“suffix”: An optional additional text to add to the end of generated responses.
“max_tokens”: The maximum number of tokens in the response, with a range between 1 and 4096.
“temperature”: A parameter controlling the randomness of the output, with a range between 0.2 and 1.0.
“top_p”: A value to control the diversity of the output, with a range between 0.0 and 1.0.
“n”: The number of alternative responses to generate, with a range between 1 and 20.
“stream”: A boolean indicating whether to stream the response or get it as a whole.
“logprobs”: Optional setting for obtaining log probabilities for each token in the response.
“echo”: A boolean indicating whether to include the input prompt in the output.
“stop”: An optional string that, if encountered in the response, will stop the generation.
“presence_penalty”: A penalty value to discourage the model from repeating a specific response, with a range between -1.0 and 1.0.
“frequency_penalty”: A penalty value to discourage the model from using frequent words, with a range between -1.0 and 1.0.
“best_of”: The number of “n” alternatives to consider and return the best one from, with a range between 1 and 20.
“logit_bias”: An optional dictionary to influence the output distribution.
“user”: An optional field for specifying a user identifier.
“role”: An optional field for specifying a role identifier.
Config files are found in the same folder as TelegramChatBot. These files must remain in folder or the application will not run.
Now that you’ve configured the application, open TelegramChatBot.exe and type “start”. That’s it, it should work from here provided you didn’t make any mistakes.
1) bots.json 2) completionParameters.json
Tutorial: Creating Telegram ChatGPT Chat Bots in C#.
This tutorial will walk you through the process of creating a Telegram ChatBot using a .NET 6.0 Windows Console application. The application you will develop through this tutorial will connect with both the Telegram API and the ChatGPT API to enable basic features that merge these two services. The end goal is to host a responsive telegram bot that calls on ChatGPT to provide an answer to a query on Telegram, and also, to create an AI-generated chat conversation with multiple character personalities.
In summary, this project teaches the following:
Learn how to connect and interact with the Telegram API through C# using Telegram.Bot.
Learn how to connect and interact with to ChatGPT API through C# using HttpClient and JSON.
Understand the basics of HttpClient and JSON serialization and deserialization.
Learn how to merge Telegram and ChatGPT services for the purpose of creating a dynamic and responsive GPT chat bot.
Learn how to create a fun bot chat where two GPT bots speak with one another through Telegram.
Step One – Connecting to the Telegram API:
Firstly, create a new .NET 6.0 or higher console application in Visual Studio. Title it as you wish, I titled mine TelegramChatBot.
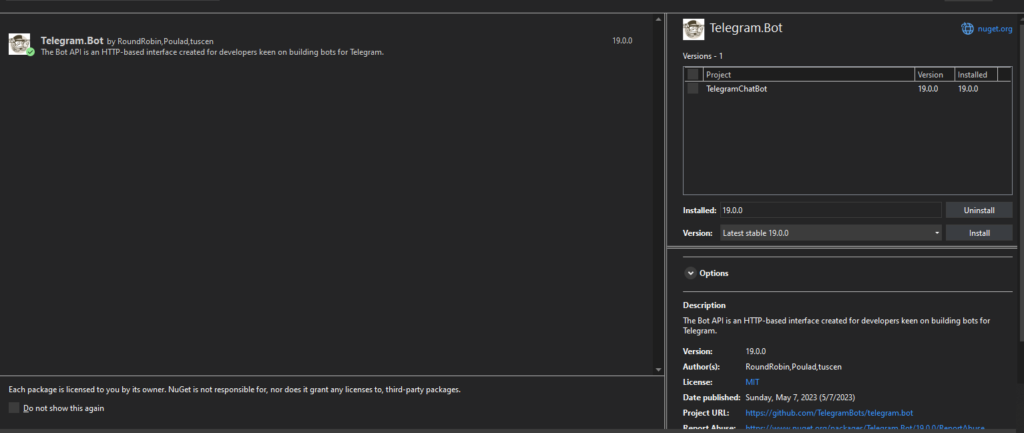
Once the project is created, we need to import the Telegram dependency from NuGet. There are many libraries that exist to help your application interact with Telegram. In this tutorial, I will utilize Telegram.Bot v19.0.0, which you can find and download from NuGet through Visual Studio. Simply open NuGet, search for Telegram.Bot developed by RoundRobin, Poulad, and Tuscen, and proceed with the download Project GitHub here: https://github.com/TelegramBots/telegram.bot
Now, create two classes as per the gist code below, ChatBot.cs and TelegramGPTBots.cs. The ChatBot has properties for a TelegramBotClient, bot name, full name, and personality. The class is initialized with an API token and default values for the bot’s name, full name, and personality, and it starts a Telegram bot client. It includes methods for handling updates from Telegram, managing errors, and a placeholder for the ChatGPT reply functionality which will develop in the proceeding steps..
Within TelegramGPTBots, I’ve initialized two Telegram bots and they are given API tokens, bot names, and other relevant parameters for the creation of a GPT chat bot. A bot client will run independently, and handle updates and communication with the Telegram API while connected. Replace the quoted text, “key”, “botname”, etc, with your Telegram bot info.
Step 2: Interfacing with ChatGPT API:
Within this step we’ll create the functionality to connect to ChatGPT. This will require that you have a ChatGPT account and an API key. You can generate and access your ChatGPT API keys here.
Within your project, create a new class file titled ChatGPT. We will use HttpClient to connect to ChatGPT API and JSON for serializing and deserializing data sent and received.
What is HttpClient?
HttpClient is a class in .NET used to send HTTP requests and receive HTTP responses from a web service or API.
In this class, an instance of HttpClient named client is created. It is used to make an HTTP POST request to the ChatGPT API endpoint.
The client instance is configured with the API key and other request parameters before making the request.
DefaultRequestHeaders.Authorization:
This line of code sets the authorization header for the HttpClient instance. It adds an “Authorization” header with a “Bearer” token, followed by the API key. This header is used to authenticate the request with the ChatGPT API.
By setting the Authorization header, the API key is sent with each request, allowing the API to verify the identity of the sender and grant or deny access accordingly.
What is JSON?
JSON, or JavaScript Object Notation, is a lightweight data interchange format created and used for the purpose of structuring data in an easily transmissible way between client and server.
For this project, we use JSON to create a request object with relevant data, like our query and GPT variables, required for interacting with the ChatGPT API. We then serialize that data with JsonConvert.SerializeObject and sent it to ChatGPT.
ChatGPT then returns its response with a serialized JSON object, which we deserialize and read.
Basic ChatGPT Class:
Now that we have created the ChatGPT functionality, let us come back to ChatBot.cs HandleUpdateAsync function. In this code segment, an instance of ChatGPT is used to create a chat bot response (variable named gptResponse) when a message contains the bot’s name or when it’s a reply to a message from the bot itself. The message text is extracted and passed as a query to ChatGPT, generating a response based on the defined personality. The response is then sent back to the Telegram chat, effectively enabling the chatbot to engage in interactive conversations.
And finally, we need an entry point. Open Program.cs and we’ll write a few lines to start our Telegram bots and handle command prompt entries.
Within the rugged Bradoastian mountains of Kurdistan is Shanidar Cave, the final resting place of at least ten neanderthal women, men, and children; our ancient evolutionary cousins. These ancient inhabitants occupied the cave as far back as 65,000 years ago. More recently, tens of thousands of years after their passing, their remains were uncovered by archaeologist Ralph Solecki over a series of expeditions to Kurdistan between 1951 and 1960. This discovery and the evidence presented by Solecki broadened our understanding of Neanderthals while also enriching our insights into their behaviour and interactions in social matrixes.
Preceding the Shanidar discovery, Neanderthals were generally portrayed as primitive and brutish barbarians. However, Solecki’s discovery and analysis challenged this preconception. Solecki had called the Shanidar Neanderthals the flower people after he discovered flower pollen grain deposits adjacent to Shanidar 4 (one of the ten Neanderthal remains found). This intriguing find, for Solecki, suggested Neanderthals may have been ritualistic and performed burial ceremonies with flowers (Solecki, 1977). Although this has been challenged by several contemporary anthropologists, it remains an intriguing argument (Gargett, 1999; Sommer, 1999).
Further, the Shanidar Neanderthals revealed they were potentially empathetic and cared for one another, and may have formed complex social matrixes. This argument is backed by evidence suggesting some of the remains revealed life altering injuries that would have required help from other Neanderthals for survival (Trinkaus & Villotte, 2017).
And more recently this year, the hidden mysteries within Shanidar continue to unfold; a discovery from this site has indicated that Neanderthals may have had sophisticated culinary habits. Evidence emerged which suggested the Shanidar neanderthals used pounded pulses as an ingredient used when cooking plant food (Kabukcu et al, 2023), suggesting they had a taste for certain flavour profiles and combinations while preparing food.
With that in mind, the Shanidar Cave discoveries represents a profound window into the depths of our evolutionary history, shedding light on the lives and adaptations of our ancient relatives; they have challenged the traditional view of Neanderthals as primitive, revealing evidence of potential ritualistic behaviour with flowers, signs of empathy and care within their community, and recent findings suggesting sophisticated culinary practices, collectively reshaping our understanding of their complexity and social lives. Therefore, I absolutely had to make the drive up to Shanidar and see the cave for myself – which I did, as an exciting solo journey.
Driving to Shanidar from Erbil
My drive to Shanidar was peaceful and relaxing. I found Maps.Me to be tremendously helpful app for directions and I’d recommend it in Kurdistan. In my experience, while I originally used Google Maps, I quickly discovered it is not up-to-date and gave me wrong directions. Around Ankawa and other parts of Erbil, Google Maps mistakenly thinks that several intersections exist that do not as they are blocked off with concrete barriers; in comparison, Maps.Me did not have this issue.
On the journey from Erbil to Shanidar is Shaqlawa, a beautiful little town adjacent to the Safeen mountains, enveloped by vineyards and orchards. Its main street is adorned with an abundance of beautiful and cozy shops, cafes, and restaurants. Even more, perched along the Safeen mountain by Shaqlawa is the Shrine of Raba Boya, originally a hermitage where monks once lived, it later became a shrine. Raba Boya is said to be capable of granting fertility wishes to those who wish to make a family (Mesopotamia Heritage, 2019). And while the town was once home to a sizable Christian community, their numbers have dwindled away in recent years (Martin, 2018). Nevertheless, I’d highly recommend paying this town a visit and spending an evening there, as it truly comes alive at dusk. It’s undeniably a beautiful town and a great place for tourists.
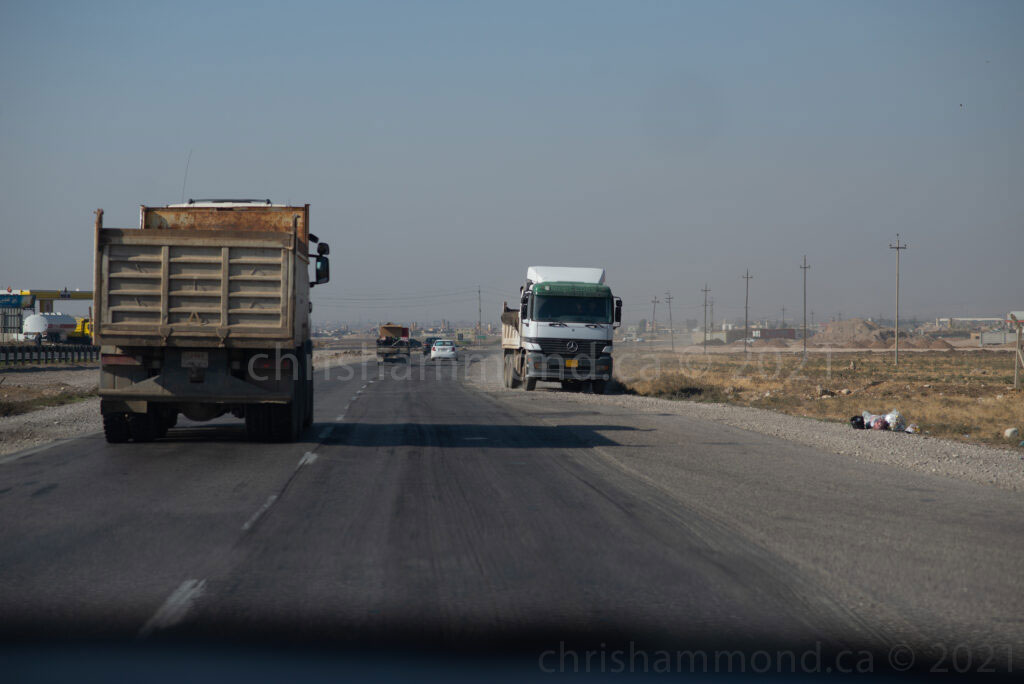
Continuing, I made my way up to Erbil Soran Rd and then Erbil Barzan Rd. Barzan Rd was very quiet, with the beautiful Zagros mountainous landscape surrounding the road, rural communities scattered throughout the region. As is common in Kurdistan region, there are farm animals that sometimes wander onto the road, which I encountered more than a few times.
Arriving at Shanidar Cave
View from within Shanidar Cave looking outward towards the southern valley. In the distance flows the Great Zab river.
Upon arriving at the base hill leading up to the cave, I was greeted by peshmerga stationed to protect the cave and surrounding area. They waved me in and I drove up to the main parking area, where I parked my car. The parking lot was nearly empty, with one other vehicle being loaded up by a family on their way out.
Stepping out of my car, my initial expectation was that the cave would have been a moderate hike up without any clear defined man-made pathway. To my surprise, the area in front of cave had been transformed into a family park with concrete and stone pathways and stairways, gazebos, benches, and even a monument dedicated to Ralph Solecki.
I embarked on my hike, enduring the hot Kurdish sun, stopping occasionally to hydrate. Despite the presence of stairs, the elevation gain to get to the cave combined with the heat required a few breaks in the small gazebos built along the way.
As I approached near the cave, I opened a small fenced gate that lines the cave entrance. I entered, moving from the sun into the increasingly dark shadows. This cave has protected occupants for tens of thousands of years; it has provided shelter to local Kurdish herders in more recent times, and pre-history, provided shelter for Neanderthals. Now, here I stood, protected from the exterior elements.
Shanidar Cave excavation site.
As I entered the cave, I glanced down the excavation site, which is towards the front of the cave and surrounded by additional fencing. Unfortunately, some litter had been carelessly discarded into the excavation site. Gazing down into the excavation, it dawned on me how deep within the sediment the Shanidar Neanderthals were buried, with soil, debris, and rock falls covering them over time. Down within this excavation, the remains of ten Neanderthals were unburied. While some had died by rockfall, as argued by Solecki, others arguably were buried by burial rites (Solecki, 1977).
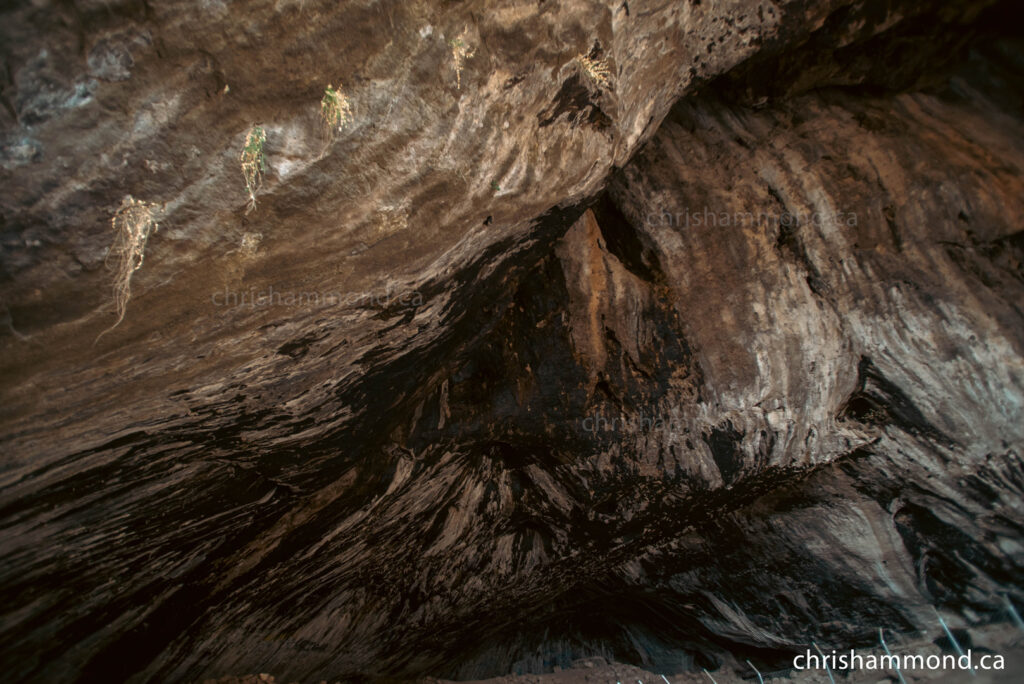
Shanidar Cave ceiling rock formation.
Using my mobile phone as a flashlight to see, I ventured deeper into the cave. The cave is vertically large, and fairly wide, yet it becomes dark quickly even with such a large entryway allowing sunlight in. I explored around, wandering around the edges of the cave before making my way towards the front again.
Before exiting, I stood by one of the rock walls and placed my hand upon it. I closed my eyes and tried to imagine the life of Neanderthals in the cave way back. Looking out into the landscape surrounding may have provided a slightly different view of than today, due to differing climactic conditions and the transformation of the landscape from human activity. At the time of the Neanderthals some 45,000 to 60,000+ years ago, it is estimated that there was a greater level of flora favouring arboreal vegetation due to more moist climactic conditions (Solecki, 1977). Herds of goats and sheep often graze the landscape, consuming vegetation, and the relatively sparsely spaced oaktrees remain smaller in size, perhaps partially due to farmers feeding their livestock branches from the trees. At the time of Neanderthals, potentially a greater source of moisture came from the glacial period and prevailing westerly winds moving through the Zagros mountains, bringing moisture from the Mediterranean (Solecki, 1977) and with it, providing conditions for a greener landscape.
Placing my had on the eastern wall of Shanidar Cave as I imagine the life of Neanderthals.
Considering more recent history, I also contemplated how the landscape surrounding Bradoast may have had a different fate as it came close to being within the vicinity of dam waters. In the late 1980s and early 90s, former plans put on hold from decades earlier to build a dam across the Greater Zab River were revived and weaponized by Saddam Hussein and his Baathist regime, who intended to use the water to flood out land that belonged to the Barzani tribe in part of a campaign of retribution against the Kurdish people. Weaponizing the landscape as a method of retribution and to attack locals was not new to the Saddam regime. Around the same time, in Southern Iraq, a system of canals and barrages were built to force out the Marsh Arabs, leaving their land and way of life destroyed (Khadr, 2019) in what may even be described as an ecocide-driven genocide. It is estimated that Marsh Arabs in the 1950s had a population of nearly half a million; however, Saddam’s campaign to destroy them had caused their numbers to dwindle to as low as 20,000 by 2003, with many being displaced to camps, and others executed (Khadr, 2019). In similar fashion, the Bekhme dam project was revived with the intention of significantly hurting the Barzani tribe, destroying land owned by Mulla Mustafa Barzani, the leader of the Barzani tribe (Solecki, 2005).
The valley just south of Shanidar Cave and Bradoast Mountain. Small oak trees are observed with most of the grass surrounding dried out. Each spring, this area comes alive with green grass and some wild flowers; however, by autumn, everything has dried out due to arid climactic conditions through the summer.
In the context of Shanidar, the building of this dam would have isolated Shanidar cave and flooded the lower lands nearby, making access to the cave difficult. In addition, important archaeological sites would likely have been flooded over, including an 11th century BC village, known as Zawi Chemi Shanidar; monasteries, and a synagogue site (Solecki, 2005). Destruction of these important sites would cause significant damage to important sites, representing a substantial impediment to our understanding of culture, history, and prehistory. Thankfully, this never came to fruition.
However, recently there are discussions to revive the Bekhme dam project. During an interview this past July, Midhat Zwayen, Director of Dijlah Consulting Engineers, suggested the dam should be completed (Menmy, 2023). And if the dam construction continues once more, this will, again, bring into question the risks stated earlier. The dam would likely result in flooding around Shanidar cave, displacement of approximately 20,000 people, and loss of the 11th century BC village Zawi Chemi Shanidar (Kehreman, 2006). Displacement of such a significant number of people is likely to be problematic when across Iraq, including Kurdistan region, large camps of internally displaced peoples already exist, to the tune of approximately 180,000 people (UNHCR, 2023).
Exiting the cave
During my walk back to the car, the two peshmerga at the entry checkpoint had walked up the path to greet me. As I approached them, they began talking to me. I couldn’t understand the questions they were asking and without mobile phone signal to translate through Google, we defaulted to acting out what we were trying to express. They first pointed to my camera tripod bag, a long black nylon bag with a black arm strap that could be mistaken for any number of other things – like a bag for measurement instruments, or possibly a rifle bag. I became a little nervous and the look on my face probably revealed as much. I opened the bag and showed them the tripod; they understood it was for my camera. The entire time they were very friendly and not aggressive. Once they understood I had a camera, they gestured they would like for me to capture their photo. I obliged.
Friendly Peshmerga greeting me on my walk down from the cave.
At first they stood together with stiff grins on their faces. However, after taking a couple of photos, the one in the Kurdish beige outfit wanted his own individual photo taken. He knew how to position himself for a good photo, and in fact, I would later use his stance for my own photos.
From there, the man in the beige suit held his phone out and signalled he would like for me to send him the photos. I somehow had to explain I had no signal but I would take their number and send it later when I could. I pointed to the status bar on my phone showing no signal; they understood. He opened viber and indicated to add him on viber. Later that day, when I arrived home, I asked a friend to type a Kurdish message for him and I attached the photos and sent.
ئيواره باش. خوش حال بوم به ناسينى جه نابتان، ئه وه ره سمه كانته. هيوادارم به دلتان بي. كاتيكى خوش.
Good evening, I hope you’re doing well. I had the pleasure of meeting you. These are your photographs, I hope you like them. Have a nice time.
I was hoping to hear back from him, but unfortunately the message went unread for quite some time. Fast forward two years, in June of 2023, I received a reply:
ده ست خوش بیت برا
Thank you brother.
References
Gargett, R. H. (1999). Middle Palaeolithic burial is not a dead issue: The view from Qafzeh, saint-césaire, kebara, Amud, and Dederiyeh. Journal of Human Evolution, 37(1), 27–90. https://doi.org/10.1006/jhev.1999.0301
Kabukcu, C., Hunt, C., Hill, E., Pomeroy, E., Reynolds, T., Barker, G., & Asouti, E. (2022). Cooking in caves: Palaeolithic carbonised plant food remains from Franchthi and Shanidar. Antiquity, 97(391), 12–28. https://doi.org/10.15184/aqy.2022.143
Kehreman, B. (2006). (rep.). Report I Bekhme Dam. Report I Bekhme Dam. Retrieved from https://web.archive.org/web/20110721200314/http://www.envirozan.info/EZ_Docs/Dams/Bexme_Dam_Report.pdf.
Khadr, A. (2019). Iraq: ‘Women are the backbone of the Marsh Arab community – as the effects of climate change are becoming more visible, it is becoming clearer that women are the first to suffer.’ Minority Rights. https://minorityrights.org/programmes/library/trends/trends2019/iraq/
Martín, I. S. (2018, June 16). Transformation of Iraqi village a warning about anti-Christian tides. Crux. https://cruxnow.com/crux-nineveh/2018/06/transformation-of-iraqi-village-a-warning-about-anti-christian-tides
Menmy, D. T. (2023, July 31). Iraq’s two main rivers will vanish if new dams not built. The New Arab. https://www.newarab.com/news/iraqs-two-main-rivers-will-vanish-if-new-dams-not-built
Mesopotamia Heritage. (2019, July 10). Shrine of raban boya in shaqlawa. Mesopotamia Heritage. https://www.mesopotamiaheritage.org/en/monuments/le-sanctuaire-de-rabban-boya-shaqlawa/
Pomeroy, E., Bennett, P., Hunt, C. O., Reynolds, T., Farr, L., Frouin, M., Holman, J., Lane, R., French, C., & Barker, G. (2020). New neanderthal remains associated with the ‘Flower Burial’ at Shanidar Cave. Antiquity, 94(373), 11–26. https://doi.org/10.15184/aqy.2019.207
Solecki, R. S. (1977). The implications of the shanidar cave neanderthal flower burial*. Annals of the New York Academy of Sciences, 293(1), 114–124. https://doi.org/10.1111/j.1749-6632.1977.tb41808.x
Solecki, R. S. (2005). The Bekhme Dam Project in Kurdistan Iraq: A Threat to the Archaeology of the Upper Zagros River Valley. The International Journal of Kurdish Studies; Brooklyn , 19(1/2), 161–VII.
Sommer, J. D. (1999). The shanidar IV ‘flower burial’: A re-evaluation of Neanderthal burial ritual. Cambridge Archaeological Journal, 9(1), 127–129. https://doi.org/10.1017/s0959774300015249
Trinkaus, E., & Villotte, S. (2017). External auditory exostoses and hearing loss in the Shanidar 1 neandertal. PLOS ONE, 12(10). https://doi.org/10.1371/journal.pone.0186684
UNHCR. (2023, August). Iraq – Operational Data Portal. https://data.unhcr.org/en/country/irq
Guide to solo driving through Kurdistan Region of Iraq
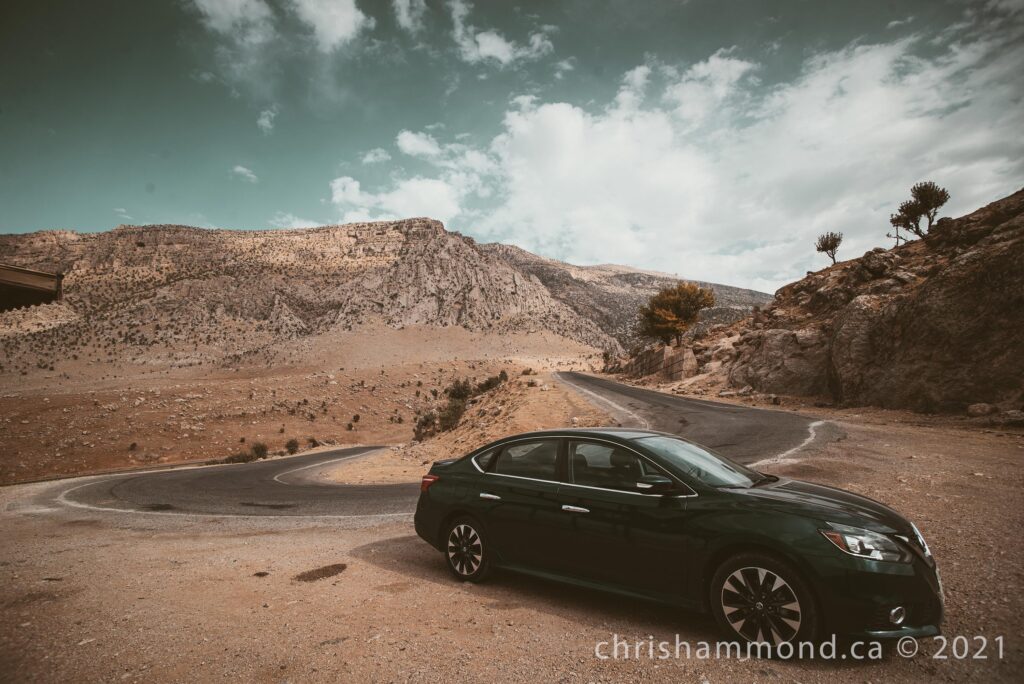
In the KRI, visiting anywhere outside of the city is easiest by car. While it is possible to travel by taxi or bus to other towns and cities, having your own vehicle will give you access to remote and beautiful areas that are not otherwise accessible. In this article, I will discuss my experience of renting and driving through the beautiful Kurdish countryside.
Renting a car
There are dozens of car rental agencies in Erbil, the catch is that most are offline and require booking over the telephone or visiting their office. If you’re looking for a deal, stay away from companies like Hertz or Avis; they’ll charge you 2x to 3x more than local rental companies, plus, you should support local small businesses. When I was in Erbil, I rented from Param. The rate they gave me was amazing, and the owner was extremely friendly.
I found Param after searching across the internet, reading Google reviews, and checking out several rental agencies on Instagram. On Erbil International‘s facebook group, Param was recommended. I called ahead of time and they advised to come in on the day I wanted to rent.
The process was relatively easy; I filled out some papers, they scanned my passport ID page, and I paid in cash (rental fee + damage deposit). There was one small hiccup – the owner asked to hold onto my passport, which I refused. Driving around Kurdistan means you’ll be going through countless military checkpoints that frequently ask for identification. Without ID, it’s likely you’ll be detained, and possibly end up in jail. I was a little surprised the owner asked this given that he should know better, but after I refused, he agreed he didn’t need it, and there weren’t any other problems.
When renting, also make sure you request a collision damage waiver. In the KRI, car insurance isn’t available for local drivers, however, the rental agencies usually provide some form of insurance. I’d highly recommend it given that the roads are filled with less-than-stellar drivers and you don’t want to be liable if the car is totalled.
Finally, if you’re unsure about driving here – don’t do it, or at the very least, take your rental out in the morning when traffic is lighter and practice for an hour. Afternoon and evenings are when traffic is the heaviest in Erbil, and this is when the roads are the craziest. If you’re prone to panic, it’s going to be a rough ride for you. Vehicles on the road will swarm you, flying by as they dangerously race well above the speed limit. While driving around KRI, I witnessed the aftermath of two fatal head-on collisions that occurred moments before I arrived. Often careless drivers are racing to pass one another and not paying attention to oncoming traffic.
Things to watch out for
On highways, sometimes you’ll encounter vehicles driving in the wrong direction. It’s pretty normal in KRI.
You’re going to want to pay attention at all times, not only to other vehicles but also to traffic cameras and the dreaded speed bumps. Even more, when driving through cities, pedestrians expect you to stop for them to cross – so watch out. This isn’t like other countries where cars are given priority, in KRI it is expected that you will slow down and stop for people crossing, and many times, they’re not going to be paying attention to you if it’s a crowded suburban road.
Speed bumps can catch you off guard. While great for slowing traffic down, they also have a habit of destroying the underside of a car if you hit them when going too fast. Based on my experience, there’s a significant number of unmarked speed bumps on rural roads, many of which I hit while driving between Erbil and Dukan. In the day, they’re easy to spot – but driving around at night, they can be very hard to see until they’re right in front of you. Given most rural roads you’ll be driving 80 to 120km/h, you won’t have time to slow down if you approach one; so, just assume that anytime you’re about to drive through an area with a shop or house on the side of the road, you’re probably going to encounter a speed bump. Grill that into your head if you plan on driving the countryside for more than an hour.
Also, traffic cameras are everywhere and most of the time, they’re marked with a sign. In November I noticed an increasing number of temporary speed cameras operating on the back deck of police pickup trucks. These are usually completely unmarked, and not easy to see ahead of time. If you pass a speed camera and notice a flash, you’re likely going to receive a traffic ticket a few weeks later.
Choosing the correct fuel
Gasoline in the KRI is not the same octane as Western fuel. It is much lower grade and does not include engine cleaning additives. I once asked if Iraqi fuel has cleaning detergents included and was laughed at. I can only imagine they thought I was talking about adding soap to the fuel. ? In the West, most fuel includes chemical additives called cleaning detergents that clean the engine, allowing for cleaner combustion and less emissions. Nonetheless, that is not the case in both KRI and federal Iraq.
With that said, given the fuel is a lower grade and not nearly as clean, it’s best not to let fuel go below a quarter tank so the debris doesn’t build up as much along the bottom of your tank near the filter. Given you’re using a rental, it likely won’t be a problem for you – but at least you’re extending the life of the fuel filter for the rental agency.
When arriving at a gas station, many times an employee will be there to fill it for you. Most of the time, they won’t know English so you’re going to want to learn how to say it in Sorani or Arabic. For me, I chose Sorani given it’s respectful to speak the Kurdish language in Kurdistan.
To ask for normal fuel, you can simply say “kaka, benzine fulika adii” or “kaka, fulika normal”. This means “sir, please fill with normal/regular gasoline”. If they don’t understand, you can sometimes get away with “adi full” or “normal full” (pronounce full as fool) and maybe two out of three times, they’ll understand you. The worst case scenario is that you may have to use Google Translate text-to-speech in Arabic. And yes, I’ve done this and had full-on conversations through Google text-to-speech, going back and forth from English to Arabic with a taxi-driver.
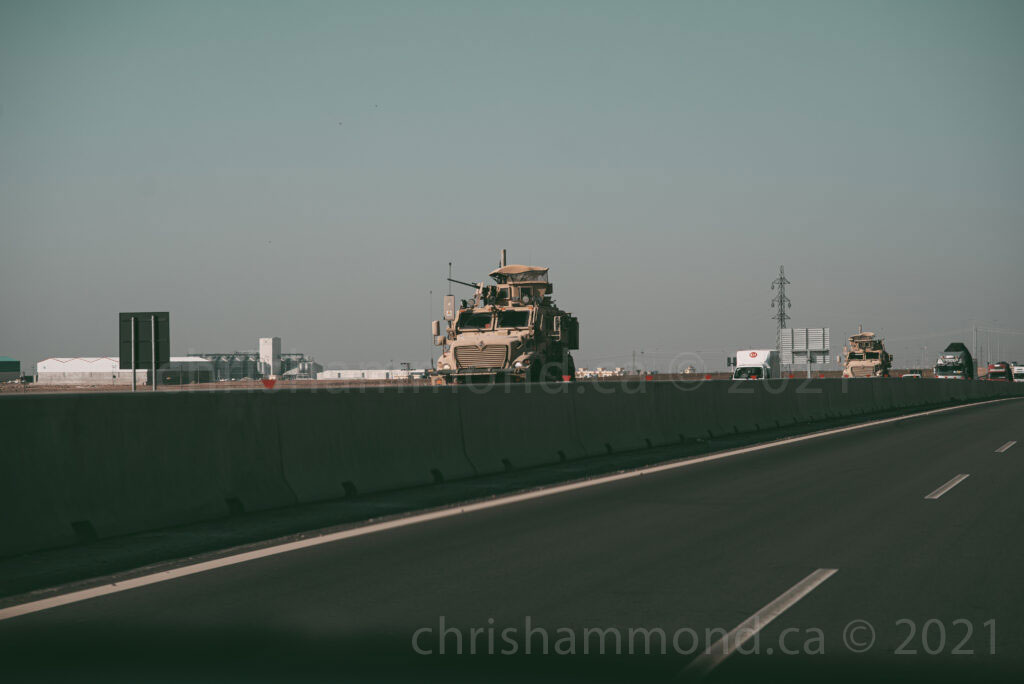
Military checkpoint etiquette
US military convoy passing by.
There are many military checkpoints around Iraq, and for Iraqis, they’re a part of daily life. Unfortunately, they are a necessity in a country that has dealt with numerous conflicts and crises, including ISIS and other violent regional actors. When approaching a checkpoint, have your passport ready. I’ve found that when driving to the south of the KRI, they check passports more often, however, driving up in the northern regions like Shaklawa, Barzan, Duhok, and Amedi, they don’t check as often.
When you approach a checkpoint, remove your hat and sunglasses, turn your headlights off if it’s night, and open your window. The guards are usually very friendly. Several times I’ve joked around with them, and often times they were surprised to see a Canadian driving out in the middle of nowhere up in Barzan area.
Other things to be mindful of:
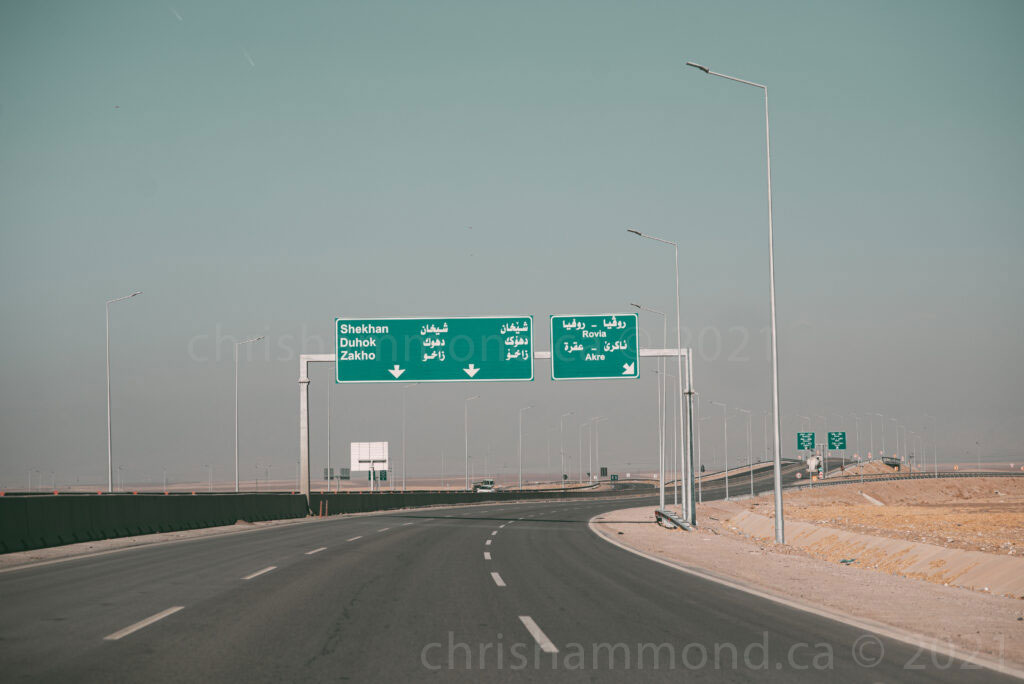
Erbil -> Duhok highway
One October evening, late at night, I was driving home along a highway between Duhok and Erbil. I didn’t realize I was entering a section under construction as there were no visible signs indicating the highway was about to end. The night was dark and there was no traffic around me other than one vehicle driving on the wrong side of the highway in our lane. I should have taken that as a warning. A moment later, as I was driving along at 100km/h, I suddenly realized the road ahead disappeared – the road was incomplete. I slammed the brakes and just narrowly avoided driving off the highway into sand and rocks ahead. It turns out that the other vehicle we just passed had also had the same experience.
With that in mind, it’s always best to drive with caution and I’d recommend taking someone who is experienced. The main concern with driving in the Kurdistan region of Iraq is not security, but rather, being mindful of other drivers and varying road conditions that require consistent vigilance. With that said, having a vehicle to drive around the countryside was a tremendous benefit and allowed me to access parts of the country that were not accessible by other means. Good luck and I hope you enjoy your journey.
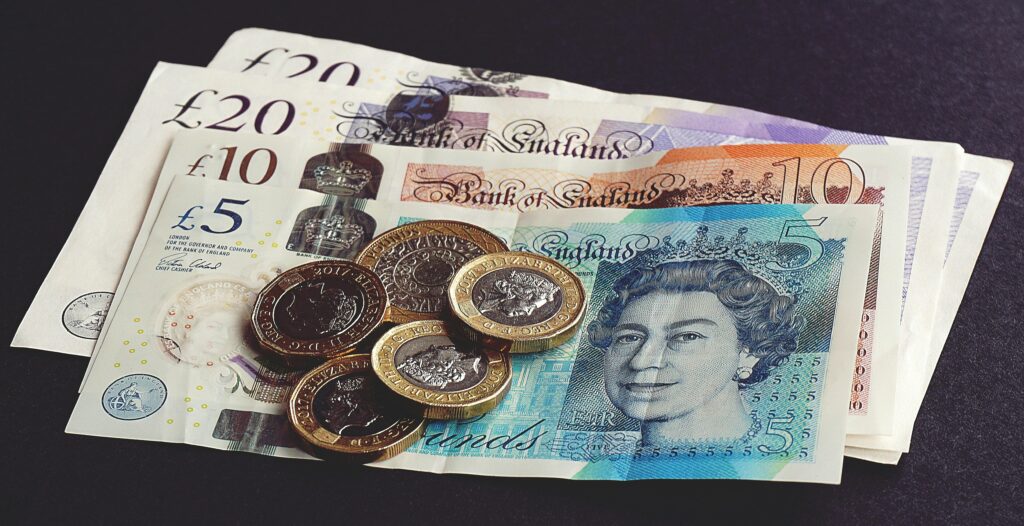
How to Convert Currency to GBP in the UK While Avoiding Expensive Fees and Rip Off Conversion Rates
Converting foreign currency into Great Britain Pounds (GBP) inside the UK is often accompanied by steep buyback rates that may cost you upwards of 20% of the amount you wish to convert. A friend of mine recently had this experience and we were pulling our hair out trying to find the best exchange rate inside the UK. She initially only carried United States Dollars (USD) in cash but then faced a dilemma when wanting to convert it to GBP and deposit it into her bank account. She could deposit it at a travel exchange, which have exorbitant conversion fees and bad rates, or she could be slightly less ripped off at the Post Office, John Lewis, or M&S where their GBP buyback rates are also high. Thankfully, we found another solution that was much more fair and very close to the actual exchange rate.
The solution is quite simple, but requires you to register for an HSBC account in UK and open a free Current Account. You can do this online and it only takes a few moments to fill out the form and then a few days of waiting for the card to arrive in the mail. The wait is worth it if you are converting a non-insignificant amount of cash. I can confirm this works if you follow these steps, provided you qualify for an account. Here are the steps:
Register for an HSBC UK Current Account online. You can do this without having to go to a branch. It may be instant, or worst case, you have to wait for the card in the mail.
Once your account is open, install the HSBC UK mobile app and set up online banking through the app.
Once logged on, open HSBC Global Money Account in the application. This is instant.
Now, open an HSBC Currency Account in USD. This is also instant. To do this, log onto the HSBC website and register.
That’s it. You can now go to the branch and deposit USD into your currency account. After, you can use HSBC currency converter or transfer it out to Wise or another online exchange of your choice, or use the HSBC rate which is much better than the aforementioned routes earlier.
Final thoughts; Although HSBC wouldn’t be my primary choice for a bank, I’d recommend HSBC over Barclay’s. I originally tried to do this with Barclay’s but their customer service was absolutely terrible; sometimes, living in UK, it seems some customer service representatives look for excuses not to help rather than actually do their job. With Barclay’s, they claim to offer online services, but then registration is followed with an in-person visit to a branch where their staff, based on my experience, are rude and borderline racist. Their loss, they just missed out on a large account. Talking to three different Barclay’s staff, each one iterated over a list of excuses about why they didn’t want to take on a large account which would have profited their institution. It was very bizarre, I have never seen so many employees in customer service not want to do the bare minimum to open a basic account.