Visa on Arrival and renewal guide for tourists in Iraqi-Kurdistan
September 2023 Update: The KRG now hosts a new Visa E-Portal, therefore some elements of this post may no longer be relevant. I have not yet used the e-portal, but when I do, I’ll provide a write-up.
—-
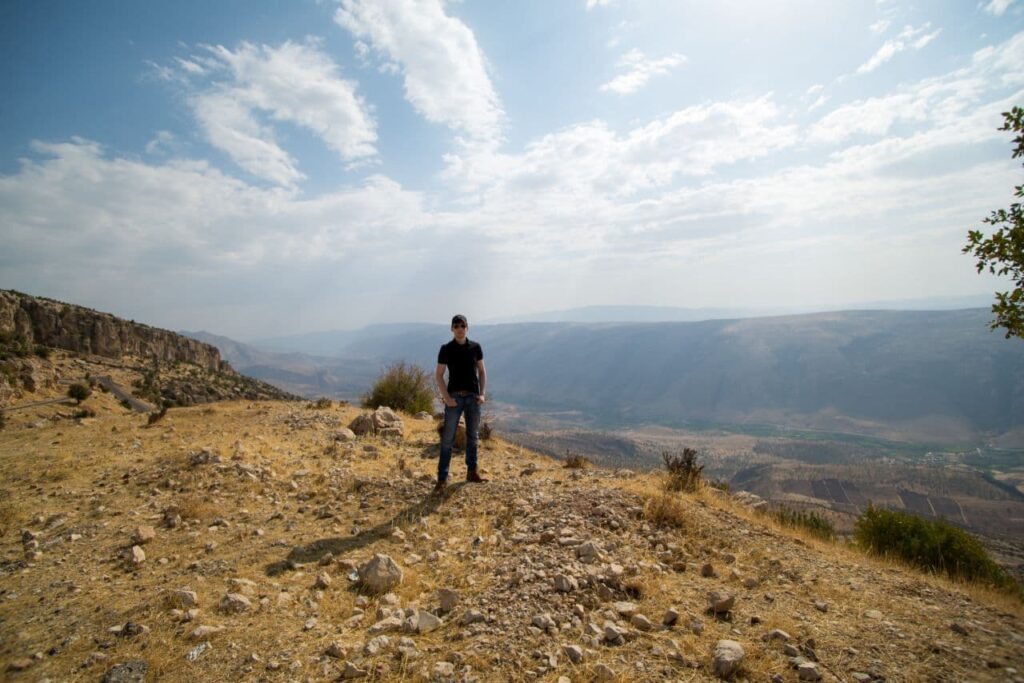
This past autumn I spent three wonderful months in the Kurdistan Region of Iraq, and it changed my life forever. I met the friendliest of people, hiked some of the most incredible trails, and visited several of the oldest historical sites in the world, dating back over 6000 years.
Now that I’ve returned home, I want to document my experiences and publish, what I think, will be a series of helpful guides for others who wish to visit Kurdistan.
A quick note – I wrote this article in December, 2021. It should be accurate for now, however, things within the KRG change frequently – so keep that in mind.
Obtaining Visa on Arrival in Erbil:
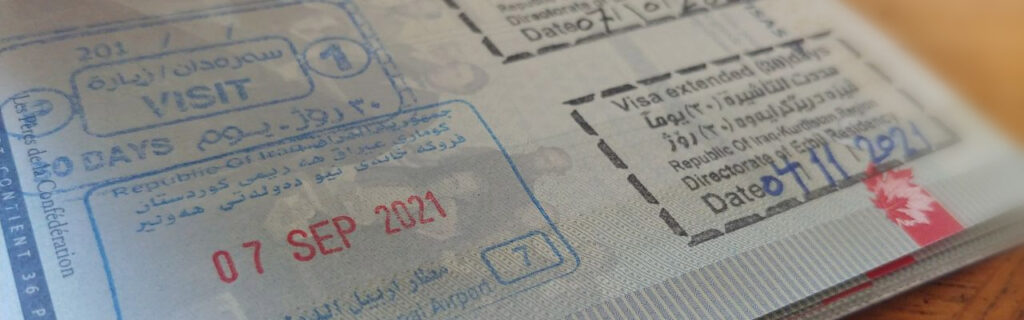
Recently, the KRI simplified the visa process for most Western citizens by providing Visa on Arrival (VOA) (list of countries here). The VOA for tourists includes up to two tourist visa renewals for a total of 90 days (30 day visa-on-arrival , 2 x 30 day visa extensions). If your country is on the list, the VOA process is simple – upon arrival at Erbil International Airport, you will make your way to the visa and customs desk. There, you’ll present your passport and pay a $75 USD visa fee. They’ll take your photo, complete some paperwork, and then stamp your passport. Make sure you have money ready ahead of time because there won’t be an ATM available to you. Likewise, have extra cash for the airport taxi before you arrive. The KRI is not a western country, they operate primarily with cash – finding an ATM can be difficult if you don’t know where to look (I’ll be making a post about this soon).
Tip: Some airlines have outdated documentation that isn’t wholly accurate on KRI. Both in Toronto and Dubai, I had to patiently explain to Emirates airline that the Kurdistan Regional Government provides a VOA for Canadians. I would recommend you print out this list here and highlight your country, so you can present it to the flight attendant if they question you. To be honest, the hardest part about my journey was convincing the Emirates attendant at the Toronto check-in desk that I’d be granted VOA in Erbil.
Renewing your tourist visa:
If you want to stay longer than thirty days on a tourist visa, you’ll require a visa extension from the KRG Residency office. Many people opt to pay a lawyer to handle this, which is likely easier; however, finding a real lawyer and not someone trying to scam you on Facebook can be difficult if you don’t have any local connections. If you want to avoid paying lawyer fees, you may renew your tourist visa on your own by following the guide I’ve prepared below. I should note that paying a lawyer likely won’t cost you too much, so it may be easier to go that route.
In addition, if you don’t speak Sorani or Arabic, you’re going to want to follow these instructions closely otherwise you’ll end up lost and frustrated. It took me three attempts to finally have my visa renewed, partially because of misinformation provided by people trying to be helpful, but also because there are very few resources available explaining this process and I had to use the trial-and-error method to figure it out.
How early may a tourist visa be extended?
Based on my experience, the KRG officers would only extend my visa on the day it expired with the only exception being if the expiry date fell on a weekend or holiday. I tried twice to renew in advance, and both times they turned me away and told me to come back on the day of expiry. This leaves things very tight, and if you go beyond the date on your visa then you may be hit with a fine, or worse, they may not renew your visa and instead deport you. If the expiry date is on the weekend, they will renew it on the last day of the week. Weekends in KRI are Friday and Saturday, NOT Saturday and Sunday.
Where are visas extended?
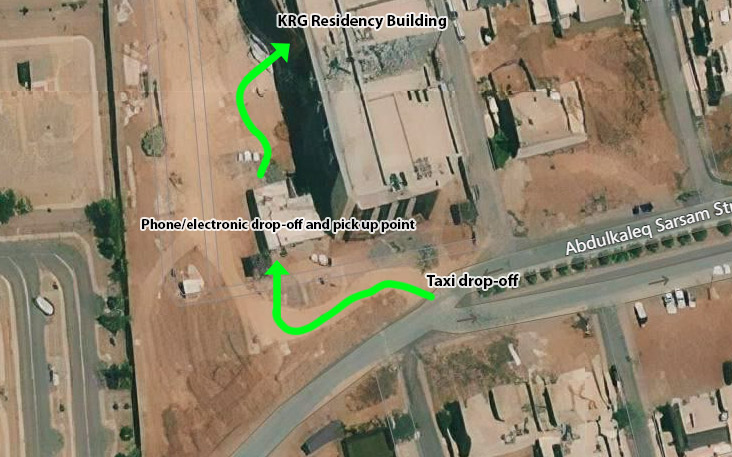
The KRG Residency office is located here on Abdulkaleq Sarsam Street, near Life Towers . Right now, Google Maps will give you the incorrect address if you search it and you’ll end up at the wrong building. Make sure you arrive by 8:30am, and once they open, make your way into the security station (the second one past the gate). You’ll have to leave all electronics with security, including your phone. In exchange, they’ll give you a tag with a number and you’ll use this to collect your electronics when you leave.
Important note: If you arrive before they open but during a busy time of year, you may have to line up outside first, and they will separate you by gender. I highly recommend you arrive early, or you may be turned away. When I was there in September 2021, there were at least a hundred people waiting to get in. It was mostly Iranian and Turkish citizens renewing their visas (Salam salam!).
Finding your way through the KRG Residency building:
Continuing, after you make it past security, walk towards the main building. Upon entering, head up the stairs to the second floor and once at the second floor, turn right and walk down to the end of the hallway. You’re looking for room 12, located at the very end of the corridor. When you enter room 12, approach the first desk directly in front (sometimes it has a #2 on it) and show your passport visa page. You’ll be given a form to fill out with your name, address, and contact number of someone local. You can write your hotel telephone number.
Tip: Before you arrive at the residency office, write down a local contact number and address on a piece of paper and keep it in your pocket. Also, bring a pen (you’ll need it). You won’t have your phone with you since it is held by security while in the residency building, so you can instead refer to your pocket note when filling out the visa renewal form.
Payment for visa extension:
After filling out the form, you’ll return it to the same desk, and the desk agent will fill out the bottom with the visa fee price. At the time of writing this, the price is 110,000 IQD ($75 USD). I’d recommend bringing dinars to pay, and bring extra in case the price has increased. You’ll then have to head down one floor to room 10. There, you’ll pay the fee, they’ll stamp your renewal form to indicate payment was completed, and then you may return to the second-floor, room 12.
Important note if you visit during the tourist season: If it’s a busy time of year for visa renewals, they may have a desk within room 12 where you will pay the visa fee. If that’s the case, then you won’t have to go down to room 10. When I renewed in October 2021, they added a desk on the left by the entry to room 12. However, when I renewed again in November 2021, during off-season, this desk was removed and I had to pay on the first floor (not ground floor), room 10.
Visa extension processing:
After payment (and returning back to room 12 if you had to leave), drop off the form along with your passport at desk #4 (the one in the corner on the right). Within 10 to 20 minutes, the agent will likely have processed your passport and then you’ll bring it to the first office (on the left side of the room). Inside you’ll find a KRG officer who will stamp your passport and write a date on it.
Once this is complete, bring your passport to the next room attached to room 12 on the right. In this second room are female KRG agents along with a higher ranking KRG officer sitting by the entrance. In there, they’ll give your documents a final lookover and press some buttons on a computer. After that, you’re ready to go, and they’ll say “Welcome to Kurdistan” – even if it’s your second visa extension. 🙂